LEGO Birthday Banner

My daughter turned 6 awhile ago and for the first time ever we were able to have a family party. My siblings and parents as well as my husband’s sister and parents all live in different parts of the US and Canada so we rarely have family at parties.

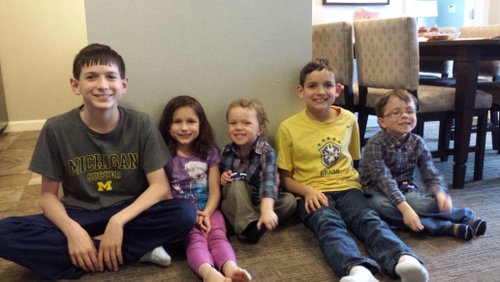
When my sister gifted our family a sking trip to Canada over spring break I knew it was my opportunity to have family members at Caroline’s party.  We were lucky to have my sister, her boyfriend, my husband’s sister, her husband, and their two sons at the party. What? COUSINS at a party? Yippee!

Caroline wanted a LEGO party so that’s what we had in the hotel room.

Caroline and I worked to make this banner a few weeks before the party.

McEachern Visit (24)

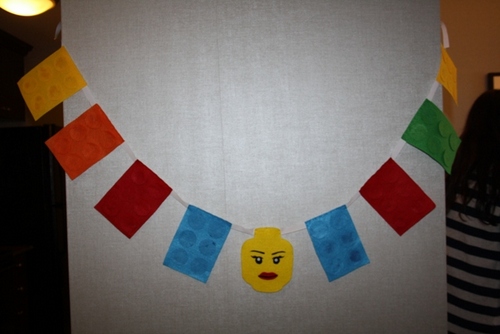
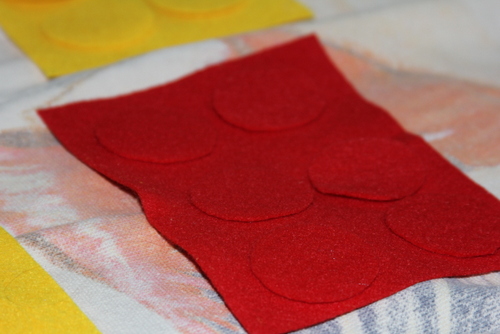
We used felt we already had and cut out squares and circles that we then glued into LEGO pieces.

IMG_8865-001

IMG_8870

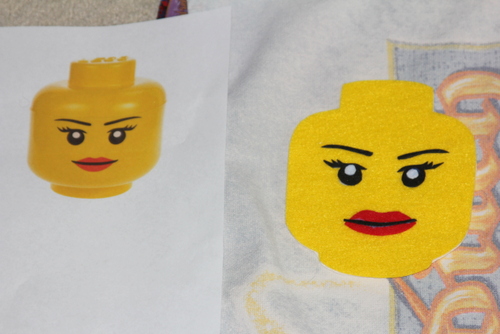
I then made the girl lego head out of more felt.

IMG_8871-002

We glued the whole thing together and had a banner for the party – our only decorations.

McEachern Visit (26)

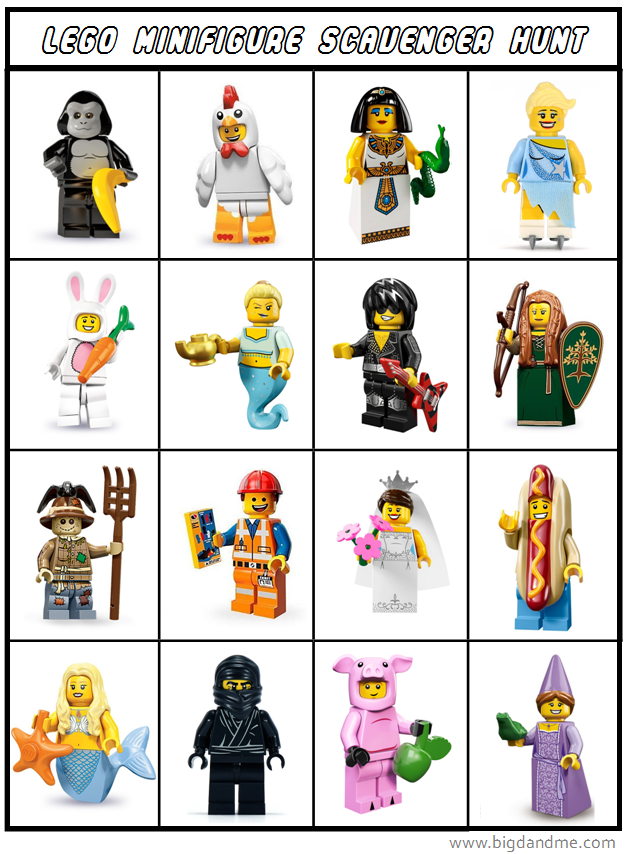
For the party we had LEGo bingo, a LEGO scavenger hunt, an awesome LEGO cake (made by her aunt and uncle), a race to build LEGO sets, and we  took a dip in the pool. It was about 25 degrees outside when we jumped into the heated pool – it was great….until we had to get out and run for the door absolutely freezing our tails off.

20150307_170000-001

Happy 6th Sweet Girl!

LEGO Minifigures Scavenger Hunt download

Caroline wanted a lego party for her 6 year old party so I decided to make this LEGO Minifigure Scavenger Hunt. She sat with me and chose all of the figured she wanted on the board.

ScreenShot

page 2 of the download is shown below along with the directions.

MINIFIGURES*Download this LEGO Minifigures cavenger hunt here*

Hope your kids enjoy this game!

*Check out the Bad Guys scavenger hunt here

*Check out the Sesame Street scavenger hunt here*

And remember you can always print out 2 copies of the board and use them as cards for a memory game.

Star Wars Art: The Final Chapter

So I have shared most of the room my boys shared but I left out one key ingredient – the large wall art.

The boys found images of their favorite Star Wars vehicles in a book and I copied them onto paper. I then used the tracer to trace the image onto the painted canvas. I then took navy blue paint and painted inside the image. Relatively easy – good thing since they wanted me to make eight of them.

Here’s my favorite – an AT-AT – that’s All Terrain Armored Transport for you Star Wars novices.

The other side of the room…

To visit previous Star Wars Bedroom posts…

Go here for the Jedi Name Art

Go here for our Minifigure Storage

Go here for our Red Frame Chicken Wire Display Boards

So that’s it.

The Star Was Bedroom for two little Star Wars fans.

Let’s hope this little obsession last for several more years.

Jedi Art

My boys have a bedroom which is dominated by Star Wars.

When we moved into our new house, my mom bought the boys Star Wars comforters for their bed, so in their eyes, the rest of the room had to follow suit.

I told them I would try.

They turned to me and said, “Try not. Do or do not, there is no try.”

“I’m just worried you won’t like it.”

To which they said, “Fear is the path to the dark side. Fear leads to anger. Anger leads to hate. Hate leads to suffering.

OK, so maybe they didn’t say it in so many words.

They didn’t have to. They’re Jedis and I read their mind 🙂

For the art work above their bed, I used 6 IKEA frames, a printer, and some material.

Four of the frames are simply Lego Star Wars minifigures printed out.

We goggled their favorite characters and found pictures which would enlarge clearly. Each minifigure had their own space thanks to the picture divider included with the frame.

The other two frames have, “Jedi Alex,” and “Jedi Andrew,” made out of left over material from their window covering.

First, I wrapped the frame in burlap. Next I used the Star Wars font to print out their names on card stock. Next, I cut out the cardstock letters and placed them over some thin denim. I held each letter in place while I cut the denim around the letter. For the space inside the letters I glued different material on top of the denim.

Across from the beds are the chicken wire frames I shared last year.

The Lego minifigure containers sit next to the frames.

Here’s one more look at the art.

May the crafting force be with you!

Lego Minifigure Wall Storage

I am sure those of you with girls are saying “Yeah, another Lego post!”

But even if you don’t share that same enthusiasm, this project may still be useful to you.

Instead of Lego mini figures insert – barbie accessories, strawberry shortcake paraphernalia, or porcelain figures

Just trust me and keep reading

Started off with wooden boxes which previously held a stamp set and a puzzle

Painted them white – two or three coats

Anchored them into the wall

Placed a small collection of Lego mini figures into the boxes

The boxes were placed next to the red display boxes we made a few months ago.

We added shelves I bought almost two years ago when a Container Store was going out of business (75% off baby!)

I need to add something above the boxes to finish out the space but for now it’s done.

The desk has papers covering it, the floor is covered in paper, and there are Mardi Gras beads in the shot. Just keeping it real. Many bloggers would have cleaned up their space before taking the pictures.

I did not….. Why?……. #1. I hate cleaning #2. It’s their room #3. I wanted the boys in bed so I could run downstairs and enjoy a bowl full of ice cream and magic shell.

Worked on any house projects lately?

Tuesday To Do Party Weekend Bloggy Reading

Killer Cake & Entry Way

Finally, the last installment of Andrew’s Lego party.

Go here for part 1 (lego bingo) and here for part 2 (lego party boards).

Andrew decided he wanted a “Killer the Croc” cake. Actually Killer the Croc was a third choice since I vetoed the first two choices in the name of difficulty. I need to watch a few more episodes of “Cake Boss” in order to tackle those particular mini figures.

So, who is Killer the Croc you ask? Apparently, he’s a bad guy from the Batman Legos.

Step 1: I made 2 sheet cakes and placed them next to each other. I then iced over both cakes and outlined the shape of Killer the Croc with a toothpick. With the outline already drawn, it was easy to know where to cut the cake.

Andrew wanted a strawberry and vanilla cake. Ask and you shall receive!

Step 2: Spread the colored icing for his body and his pants.

Step 3: Add white icing for his mouth

Step 4: Add red icing for the eyes

Step 5: Use a thin icing point and outline the eyes, teeth, and muscles? scales? in black

When Andrew saw the cake before the party he said,”This is my best party ever.” Now that’s a pretty good review even before the party started.

I put together a simple Lego display guests saw when they first entered our house. The boys created the “6” and chose the minifigures to display. I copied a picture of Killer the Croc, and gave him a word bubble which said, “Andrew, we love you to pieces.”

I’m pretty sure we will have another Lego party in our future so I hope to use some of these ideas again.


Todays Creative Blog

Lego Mini Figure Party Boards

For Andrew’s Lego party we created large wooden character boards.

During the party we took pictures of each guest behind the boards. When Andrew sent a thank you card in the mail, each guest also received a photo of himself as a Lego mini figure.

Below you can see Andrew is “Jay” from the Lego Ninjago sets.

On the back side of the boards are different characters I painted for our Halloween party. Since we already had the boards cut, it was a simple tracing and painting process to complete this set.

Below – “Penguin” from Batman Lego sets

Steps to Create Lego Party Boards:

1) cut board into desired size

2) use a tracer to copy image directly onto board

3) cut out head section

4) paint

5) cut large blocks for legs so the structure will stand up.

“Batman and Robin” mini figures

Below: The large board slides into the ground blocks in order for the structure to stand.

In case you missed it, we also played Lego Bingo – go here for a copy.

One more Lego party post coming soon!

Todays Creative Blog

The DIY Show Off Katie's Nesting Spot The Shabby Nest

Lego Bingo

For Andrew’s 6th birthday party we had wonderful plans…

Early May is typically hot in Texas so we planned on taking the kids to the park to use water balloons and play.

Sounds great, doesn’t it? Except…that it turned out to be forty degrees outside and raining.

Therefore, the night before the party, Derek and I scrambled for new inside activities.

One of the activities we decided on was Lego Bingo. Derek created the board template and  I inserted the Lego mini figures.

The game was actually a huge hit with the kids. The winner of each game received 2 silly bands while everyone else received one.

The Game includes: 9 different bingo boards & 42 call cards (Cuts these cards apart and use to call out mini figures)

If you would like a copy of the Lego bingo here it is – Lego-Bingo.

If you decide to print, please consider becoming a follower of Big D & Me.

I’ll share more of the party soon – check back for more Lego party ideas!

Todays Creative BlogTidy Mom Chic on a Shoestring Decorating 504 Main

Lego Man Cake

Alex had a Lego party for his 9th birthday. Derek suggested making a Lego brick for the cake but I quickly dismissed that suggestion since it did not seem like a challenge. Alex provided me with this figure as inspiration for the cake. So I went for it and think it turned out all right.

Step 1: You need: 2 boxed cake mixes, frosting dye, and 5 large containers of frosting. No, I don’t even consider making my own frosting.

Step 2 – Place both cakes side by side and then carve out the general Lego man shape. Follow up with an initial layer of frosting. Place the cake in the fridge – it’s easier to put the next layer of frosting if the first layer is more solid.

Step 3 – Create the bodysuit? armor? training clothes? with orange icing. I used clear icing bags and a basic frosting tip for the rest of the icing.

Step 4 – Use gray icing for the equipment and part of helmet. I started questioning my cake decorating abilities at about this point – hmmm… 2 hours till the party, I wonder if the grocery store could make a lego brick cake in such short notice?

Step 5 – Using a wider icing tip I created the white sections of the helmet

Step 6 – The first attempt at making “Lego skin” was too pink (very bad in the eyes of a 9 year old boy) so I tried again and got a brown color. Good enough.

Step 7 – I added the black icing sections.

Step 8 – I added the red sections and called it done.

There were certain parts of the cake I wasn’t thrilled with but Alex was excited with the cake and that’s all that counts in the long run.