A Home Made Ghost Pinata

I made this pinata last year for our Halloween party but never got around to sharing it. This project is easy and lots of fun as long as you are not a perfectionist with your decorations.

Since the name of the game around here is use what you have this project was totally free. I used newspaper, a balloon, flour, water, salt, crepe paper, and construction paper.

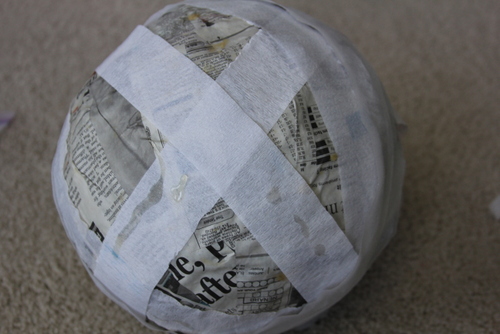
I started by covering an inflated balloon with strips of newspaper using a glue/water/salt combination. I would not use this method again since it was just difficult to spread the cold flour mixture all over. Instead, I would just use a mixture of half glue and half water. I’ve used that in the past and it’s a great consistency.

IMG_7481

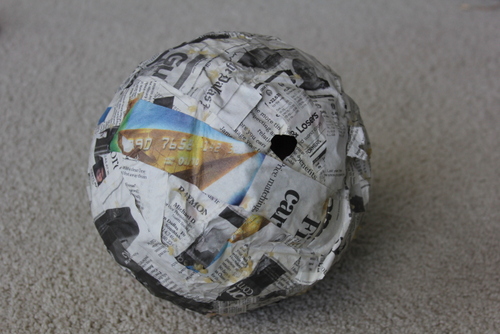
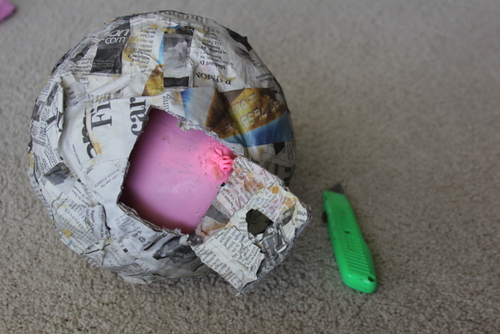
Over a period of days I added several layers of the newspaper. When I felt I had a sturdy enough oval I cut a flap in the bottom of the pinata and deflated the balloon in order to remove it.

IMG_7483

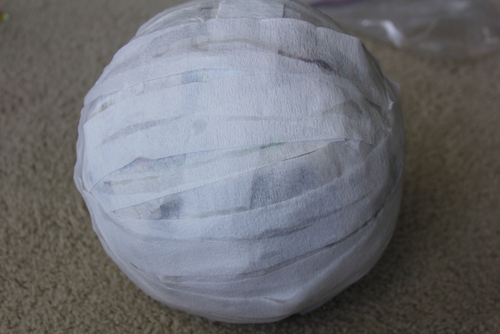
Next I grabbed white crepe paper which was leftover from someone’s birthday party and covered the entire oval using a glue gun. *Remember to leave a spot open in the top so that you can hang your creation somehow.

IMG_7485IMG_7484

IMG_7486

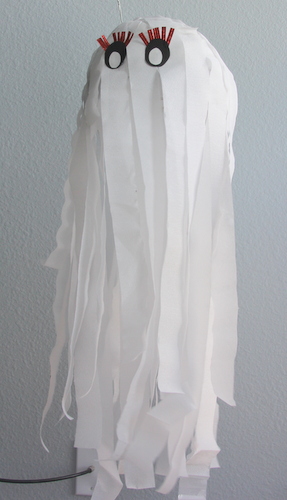
The next step was to glue on long pieces so the “ghost” would in fact look like a ghost.

At  this point you can place the candy or trinkets into the bottom of the pinata flap and then glue it shut with some pieces of crepe paper.

IMG_7498

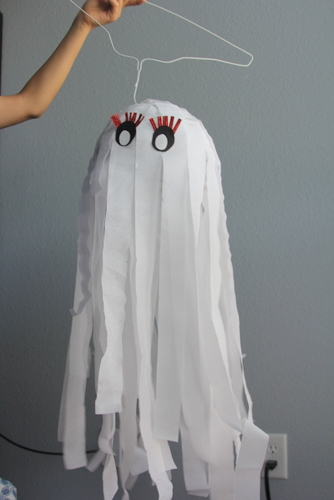
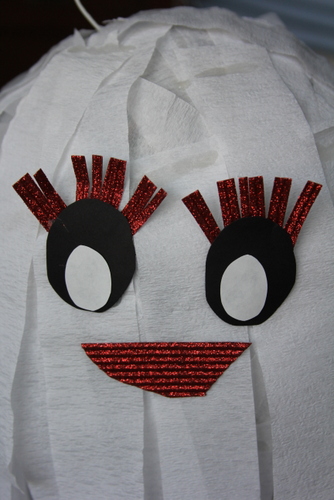
My five year old then helped me create a face for our ghost which we glued on.

IMG_7499

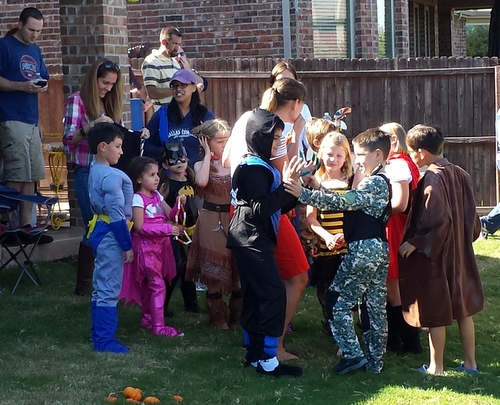
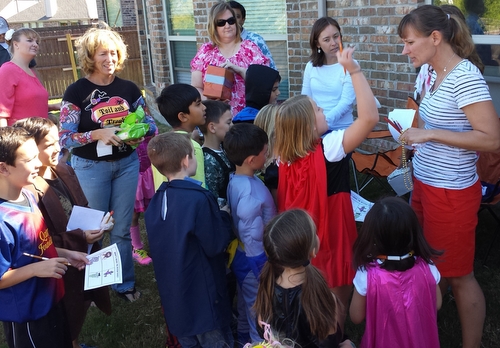
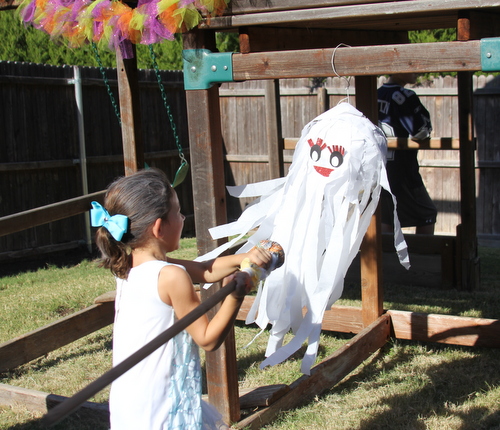
And here she is in all her glory getting whacked by my daughter at the party.

IMG_7754

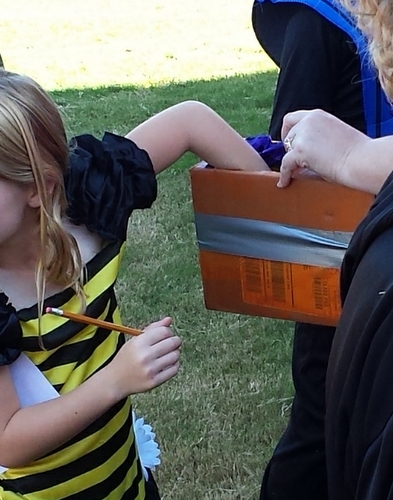
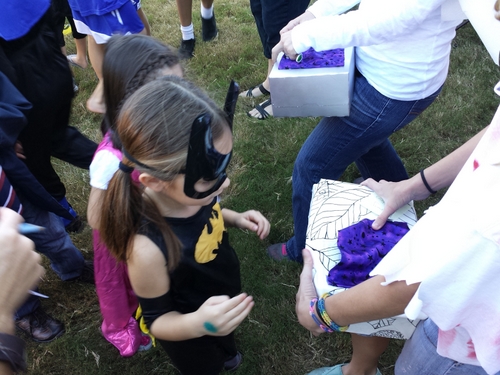
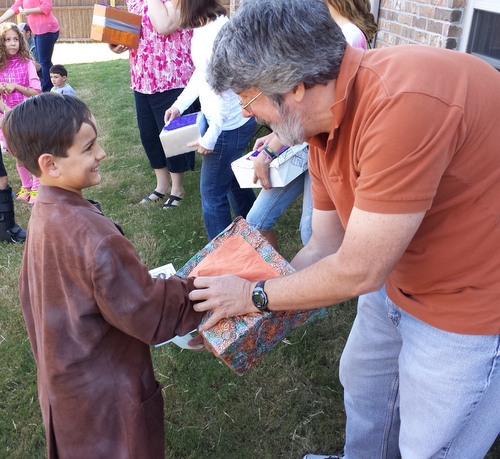
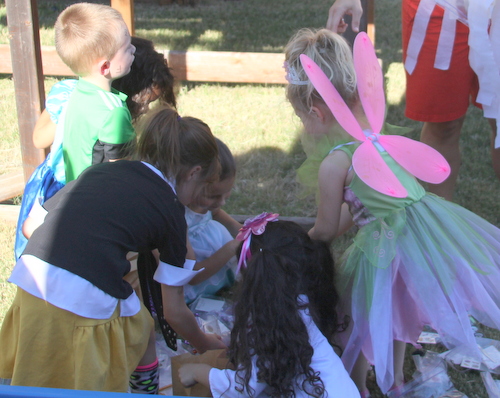
Once someone busted open the pinata and everything fell out it was as if they had never seen Halloween stickers, bubbles, pencils, toys, plastic fingers and spiders before.

IMG_7755

IMG_7492

I’ll definitely be making another pinata this year – this one served us well.

Easy Lazy Day Art Project for Kids & Adults

Here’s a fun art project I discovered when cruising around the web…Glue & Salt Painting!

IMG_9735

Here are the directions:

1. Make an interesting design with some glue on your paper – we went abstract but you could easily makes a butterfly, house, car, fish, etc.

IMG_9731

2) Generously pour salt over the glue.

IMG_9729

3. Shake off the excess salt carefully.

IMG_9726

4. Use watercolors to paint the salt. The more liquid the paint the better.

IMG_9741

5. The salt will just absorb the paint right up.

IMG_9742

6. Have fun!

IMG_9746

I even got in on the art action with my creation below.

IMG_9736

My younger two and I had a really nice time painting on a rainy day. We sat at the table for about an hour making several pieces a piece. We listened to Radio Disney while we painted and just talked about all sorts of topics.

IMG_9737

I could have used the time to clean the dishes or fold some laundry but I’m really glad I just sat and spent some time with my kids.

*Sidenote – this is art that will be thrown away after a day since the salt makes it virtually impossible to hang up*

Thankful Turkey – A Family Tradition

Each year I make a paper bag turkey and feathers for our family’s annual Thankful Turkey.

He usually gets called Tom the Turkey or Ted the Turkey and we add thankful feathers onto him each day.

Here’s a photo of our 2009 Tom:

IMG_2440

This year I decided to upgrade us to brown wrapping paper.

I know, we are the last of the big spenders.

I found a turkey picture I liked, printed it out, and drew freehand the turkey onto the brown paper.

IMG_3014 IMG_3015 IMG_3016 IMG_3022

My children have informed me that it looks like Ted is holding his private parts.

Children.

You just have to love them.

Or tell them, “Do not say Ted the turkey is holding his private parts ONE MORE TIME!”

IMG_3024

After dinner, everyone takes a feather (scrap paper I have) and writes down one thing they are thankful for that day.

After I had written my feather on the first day I asked my preschooler what she was thankful for.

She said God.

IMG_3025

I decided to take that moment to add a bit to my feather.

IMG_3026

Here are some more things we are thankful for…

IMG_3027

IMG_3029

IMG_3031

IMG_3032

IMG_3033

But don’t worry the next holiday is never far from our minds.

IMG_3030

And just to cover our bases…

IMG_3028

🙂

Mystery Boxes…Do You Dare (Halloween Party 2013)

We had our annual Halloween party this past weekend and it was a lot of fun.

Camera 360 Camera 360

As well as being quite tasty.

Camera 360

Camera 360

But….not too healthy (only some of the butter we used).

Camera 360

We may have cooked ourselves silly making sugar cookies, pumpkin whooopie pies, banana bread, oreo mummies, cupcakes, chocolate faces, pretzel witch fingers, pretzel eyeballs, marshmallow sticks, rice krispie treats, snickerdoodle cookies, and pumpkin muffins.

Camera 360

We also played a game which I think the kids enjoyed – Mystery Boxes

The idea of Mystery Boxes is to reach into the box and try and figure out what food is in there.

For example, I told the kids that I had witches hair. Once they felt it, they needed to decide what food my witches hair really was.

I took 4 boxes (Cheezits, Amazon, shoe boxes) and spray painted them or covered them in fabric with Modge Podge.

IMG_2938-001

I then glued on a piece of cloth to the outside which covered a hole I had cut out in each box.

IMG_2943

Each box on the inside was lined with tin foil. One had a cup and another had a bowl which held the food items.

IMG_2942

Before starting the game, I handed out a piece of paper to each child and told them what was in the mystery boxes – witches hair, mummy intestines, troll eyes, and Frankenstein eyes. Then I had some parents hold the boxes for me, not letting the kids peek inside the boxes.

Camera 360

Camera 360

This picture of my son reaching into the box is my favorite one from the party.

Camera 360

Here’s a sample of the sheet with their guesses on it.

IMG_2940

Here we all are talking about what each of their guesses is for the food items.

Camera 360

And the reveal….

Camera 360

In case you are wondering…

Witch Hair = Ramen Noodles

Frankenstein Eyes – Olives

Mummy Intestines = Lasagna Noodles

Troll Ears = Dried Apricots

___________________

Mystery Boxes = Silly & Slimey Fun 🙂


Halloween Entrance

I love decorating for Halloween.

May thru September?

Not so much.

But when we roll into October I’m ready with the Halloween decor.

When I was over looking at Yellow Bliss Road I saw her free Halloween Countdown printable and thought it would be perfect in our entry way.

I printed out her chart and then printed out some Halloween characters on an orange piece of paper.

IMG_2700

My kids take turns choosing which character to put up each morning.

As a former math teacher, I really wanted them to create a pattern with the shapes but they were having none of that idea.

IMG_2701

I just might admit to redoing their blue painters tape circles each morning after they head off to school.

IMG_2699Borrowed some ceramic owls from my daughter’s room.

IMG_2697

I added the orange pompoms that I had left over from a project several years ago and some purple beads.

I should probably add a black curtain over the shoe container in order to cover up our unsightly shoes but that’s just crazy talk really.

Happy Halloween Decorating!

Our Favorite Art Books

I love to buy artsy books for my kids (and sometimes me!) to draw with.

Now don’t get me wrong, I fully believe in blank paper in order to create but sometimes it’s just fun to try drawing an alligator or a funny person.

Here are some of our family’s favorite art books (my kids are 11, 7, and 4 if that helps):

Ed Emberly’s Drawing Book

ed emberley animals

tumblr_ls6mcuGQrE1qa81xn

Doodles at Lunch & Doodles at Breakfast: 36 Tear-Off Placemats

doodles at lunch placemat

doodles at lunch detail

Animal Doodles Place Mats

9781452107158_p0_v3_s260x420

899cce64d99b7b680e26e97813275db5

642 Things to Draw: Journal

9496007-642-things-to-draw

053

and this is the next book I want to get for our house

The Boys’ Doodling Book

boys-doodle-book

and maybe in a few years we’ll purchase this one

The Girls’ Drawing Book

9780762435050_p0_v2_s260x420

41GlO-BT0sL

Happy Drawing Everyone!

From Birthday to Easter Decorations – Easy & Lazy

Caroline’s birthday party was over 3 weeks ago – so naturally the decorations are still up.

Since I liked all the bright colors I figured I could keep them all up  for Easter (and the rest spring) by just tweaking a few things.

From the party, I kept the tie banner & just changed out the inside of the frames…

IMG_6679IMG_6668

IMG_7037

IMG_7038

 Our front door was…

IMG_6845

IMG_6847

but is now…

IMG_7041

IMG_7043

IMG_7042

IMG_7044

*an old frame, string, glue gun, and paper

And finally, the fireplace was…

IMG_6744-001

and is now…

IMG_7033

*the pink paper in the frames was shiny wrapping paper my sister wrapped Caroline’s presents in

*the “Pow, Kaboom, Bam” banner is just turned around

*the chalkboard has been wiped off and colored by the kids and I

Easter / Spring decorating done –

And as an added bonus, I’m sure Alex will appreciate the house being already decorated for his 11th birthday which is in a few weeks 🙂

Cardboard Boxes – So Much Fun!

The last time I talked about Caroline’s super hero party it was concerning the scavenger hunt, bean bag toss, and the chest letters they received.

Today it’s, “Exploring the City!”

When I looked on pinterest for Caroline’s super hero party I came across party decor which had buildings with it. I thought, wouldn’t it be fun for the girls to be able to play in the buildings?

IMG_6794

Otherwise known as, “Cardboard Boxes are so Much Fun!”

One of the missions the kids had to complete was, “Explore the City.” This simply meant, bring out some cardboard boxes and let the kids have fun.

IMG_6793

A week before the party, the kids and I drove around gathering big boxes that had been discarded in the new subdivision they are building near us.

We then set up a painting station on our driveway and got to work painting the boxes.

I used regular house paint that we already had so the cost for this project was $0.  

IMG_6655

Caroline wore her painting outfit – yellow pants, old white shirt, and a pair of the boys’ old water shoes – always looks like she’s a retired Floridean 🙂

IMG_6660

IMG_6658

Everyone got in on the action.

IMG_6661

IMG_6663

Once the boxes were dry, my husband cut out doors and windows in each box.

And here are the final results –

Every Super Hero town needs a City Hall…

IMG_6851

the Movies…

IMG_6852

A Jail to put the bad guys…

IMG_6853

And the library!

IMG_6839

IMG_6844

The cardboard boxes stayed in our house another week before they were completely destroyed.

Good fun!

Super Hero / Bad Guys Scavenger Hunt

At Caroline’s super hero training birthday party, the kids were required to complete 4 missions.

Each mission had one or two components. For example, there was an “Accuracy Mission,” since all super heroes need to have good accuracy when fighting the bad guys. A bean bag toss and a ping pong bounce game were played in order to test our little super hero trainees. Since they passed that mission, they received super hero cuffs – more on those another day.

IMG_6745

The 2nd mission, the “Eye Test,” consisted of two activities – Super Hero Bingo and Bad Guy Scavenger Hunt. Super heroes need to have good eyesight to spot the bad guys so these activities tested that.

The Bad Guy Scavenger Hunt was definitely a 4 year old favorite.

Each trainee was given a marker and a sheet containing 16, “Bad Guys.” I used characters they might know of instead of typical comic book villains.

scavenger_hunt_bad_guys

Click here for the Bad Guys Scavenger Hunt

The trainees were then asked to walk around our first floor to find the bad guys. They particularly enjoyed being able to mark off each character once they found a bad guy.

Before the party I had printed out large versions of the same characters on their scavenger hunt sheet and taped them around the house.

Mother Goethel from Tangled

IMG_6755

Can you spot Captain Hook?

IMG_6770

Syndrome from the Incredibles

IMG_6773

Once the trainees completed their eyesight mission –  bingo game and the scavenger hunt – they received a chest letter (piece of felt with a safety pin (with a flat back) glued onto the back.

IMG_6821

IMG_6813

Man, four year olds are so much fun!

All 11 of the girls loved dressing up and were totally game for each mission.

Scavenger hunt for 4 year olds, mark that one down as a keeper!


Simple Christmas Card Display

Last year I hung our Christmas cards in the entry way. They were placed on large pieces of ribbon and attached with clothespins.

Well, I’ve radically changed things up this year and hung them in the family room on ribbons with PAINTED and GLITTERED clothespins.

Yep, pure craziness around here!

One of our countdown to Christmas activities was to decorate the clothespins.

Can you tell who has been a challenge to photograph lately?

The kids each painted about 8 clothespins with white, red, and green paint.

Some were solid colors, others with stripes and dots.

Yes, she’s in her bathing suit in December. Technically it was about 45 degrees outside at the time so she should have been in pants and a long sleeve shirt but sometimes it’s best to choose your battles.

The next day, after the paint was dry, the kids used a glue pen to make designs or words. Silver and gold glitter was then poured over the glue.

 “Ho Ho Ho.”

“Naughty”

“Nice” and candy stripes

In order to hang the ribbons I used Command Strips.

I folded the ribbon several times and then cut a hole so that I could double up the ribbon.

 Add a bow to the top and your done!

These pictures were taken a week ago so the ribbons are filled with cards now and look great.

How are you displaying your Christmas cards this year?