Banner with Ties

Caroline turns 4 today so we are well into party planning mode for the weekend.

For the 11 months and 3 weeks she requested a super hero party on a regular basis.

Last week she decided she wanted a cheetah party.

So we’re having a super hero party where the person of honor is wearing cheetah leggings and a cheetah tutu and calling it,” The Super Hero Party Where People Can Be Super Hero Cheetahs if They Want to Be.”

Classy party we’re hosting around here.

We’re also hosting this party on the cheap so we are using supplies and materials that we already have first and then buying second.

Therefore, the party colors are bright yellow, blue, and pink, since I had leftover fabric from my sisters shower last year. Caroline approved of the colors so we moved forward.

So first up for the Super Hero Party  – the foyer.

IMG_6679-001

IMG_6666

IMG_6668

IMG_6669

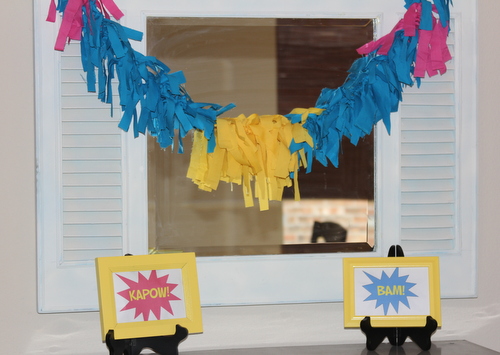
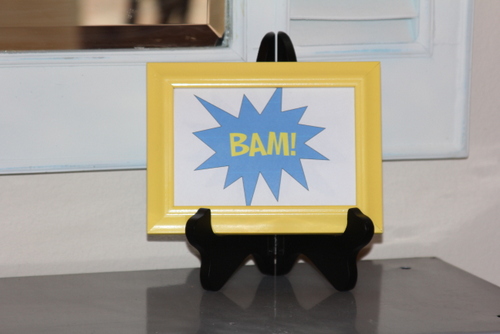
For the “bam” and kapow” signs, I used yellow frames we already had and placed the images I created on the computer inside them.

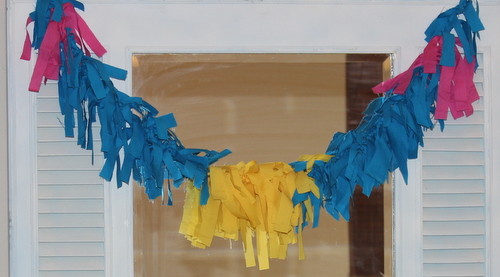
For the “banner with ties, ” I used fabric strips and string – super easy.

IMG_6667

I cut strips of fabric in varying widths and tied them onto the string with one tie.

IMG_6672

IMG_6674

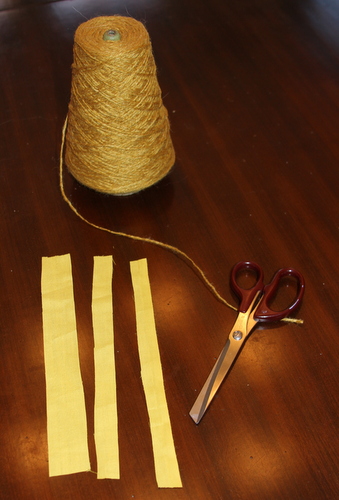
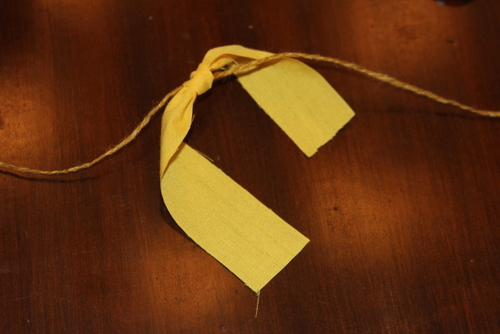
Here I have tied on 3 pieces of fabric.

IMG_6676

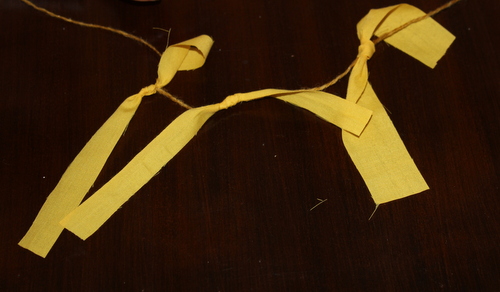
Once you have tied a few pieces of fabric, push them together – I know, rocket science here.

IMG_6678

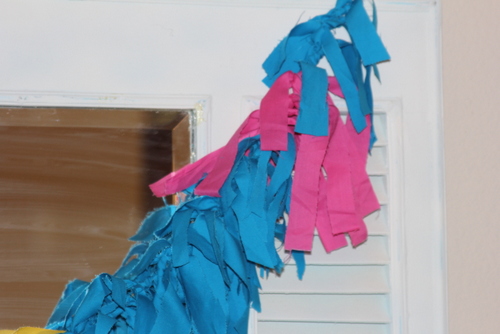
I just kept adding pieces until I thought it was long enough – in the beginning I was worried with how it was turning out but once I had tons of the pieces on there I was happy with it.

IMG_6670

IMG_6679-001

Now onto bean bag boards, painted cardboard boxes, and lots of sewing!

Simple Christmas Card Display

Last year I hung our Christmas cards in the entry way. They were placed on large pieces of ribbon and attached with clothespins.

Well, I’ve radically changed things up this year and hung them in the family room on ribbons with PAINTED and GLITTERED clothespins.

Yep, pure craziness around here!

One of our countdown to Christmas activities was to decorate the clothespins.

Can you tell who has been a challenge to photograph lately?

The kids each painted about 8 clothespins with white, red, and green paint.

Some were solid colors, others with stripes and dots.

Yes, she’s in her bathing suit in December. Technically it was about 45 degrees outside at the time so she should have been in pants and a long sleeve shirt but sometimes it’s best to choose your battles.

The next day, after the paint was dry, the kids used a glue pen to make designs or words. Silver and gold glitter was then poured over the glue.

 “Ho Ho Ho.”

“Naughty”

“Nice” and candy stripes

In order to hang the ribbons I used Command Strips.

I folded the ribbon several times and then cut a hole so that I could double up the ribbon.

 Add a bow to the top and your done!

These pictures were taken a week ago so the ribbons are filled with cards now and look great.

How are you displaying your Christmas cards this year?


Easy Advent Calendar with a Paper Bag

***I am reposting this from 2 years ago – the only change I will be making for this years advent calendar will be at the end of this post***and sadly, I have to report that there was no big Powerball win for us last night – here’s to hoping no one won!

Last year the kids and I made a paper bag Christmas tree which they partially decorated using markers. Here’s the way our advent tree works.

On December 1 they receive a paper ornament which states something we will be doing, watching, or making that deals with Christmas.

One of the boys gets to glue it onto our tree. The next day the other one gets to glue it on.

On certain days they receive their ornament before school while other days they receive their ornament after school (it depends if I have my act together or not). Here’s a picture of the finished project.

advent treeHere’s a close up of some of the ornaments. Some days they would receive one ornament while on other days they would receive a bonus one.

ornaments
There is a small part of me that cringes when these are glued onto the tree every which way. I do have to tell myself that having symmetry in this craft is not the purpose. But oh how I sometimes try to make suggestions of where the ornament could be placed.

This year I’ve made a tentative list of activities for our family. Some will change based on schedules and weather but it’s a start:

  • Wed Dec 1 – Watch The Grinch
  • Thurs Dec 2 – Make Christmas cards for grandparents
  • Fri Dec 3 – Choose Angels from Angel tree
  • Sat Dec 4- Andrew’s Christmas program
  • Sun Dec 5-Shop for Angels
  • Mon Dec 6 – Have hot chocolate & marshmallows
  • Tues Dec 7 – Watch Frosty’s Winter Wonderland
  • Wed Dec 8 – Turn in Angel gifts & get cookie at mall
  • Thurs Dec 9 – Watch Santa Claus is Coming to Town
  • Fri Dec 10- get tree?
  • Sat Dec 11-Photo with Santa at school
  • Sun Dec 12-make snow globes
  • Mon Dec 13-Assign & Hang Stockings
  • Tues Dec 14-drive around and look at lights
  • Wed Dec 15-?
  • Thurs Dec 16- Andrew’s school Christmas party
  • Fri Dec 17-Alex’s school Christmas party
  • Sat Dec 18-Frisco downtown – Santa parachutes in?
  • Sun Dec 19-wrap some presents
  • Mon Dec 20-Go see Northpark train display?
  • Tues Dec 21-Make Christmas cookies
  • Wed Dec 22-Aunt Amanda, Uncle Ryan, and Gramma & Grampa arrive
  • Thurs Dec 23-Aunt Kelly & Uncle Ben arrive
  • Fri Dec 24-go to ICE! display in Grapevine
  • Sat Dec 25 – Christmas

***Changes this year – Now 3 children will be placing ornaments on the tree *** Our activities each day has changed *** I am using large brown craft paper that I also use to wrap gifts in***

Do you have any unique ways your family celebrates the holidays?

October Gaols Reviewed

In addition to a busy and eventful October, I started a new part time job. Therefore, all of my October goals were not completed.

Add 1 item to etsy shopFail!

Touch Up Paint DownstairsCheck!  Walked around the house one day with a can of paint.

Scrapbook 10 pagesFail!

Make / Find Containers for Boys’ Room Check! I found some containers at IKEA which seem to work. Now they have a place to keep pencils, glue sticks, colored pencils, markers, and crayons on their desk.

Complete Making 3 Halloween CostumesCheck! Army Man, Wonder Woman, and Dumbledore were happy with their costumes!.

Host Halloween PartyCheck!

Finish Christmas Shopping for 5 people on My ListFail!

Fix Up Backyard, If Only for A Few Days for the Party Check! We bought a set of table and chairs for outside, added some flowers, and filled up the holes in the back yard which the dog had dug. It was glorious for four days – that’s until Sophie came back from the kennel and dug all the holes again. Ugh!

 How was your October?

Front Yard Halloween Sign

In a previous post I mentioned that I liked this Halloween decoration…

Well, our family made our own using materials we already had.

In the garage we found planks of wood from a pallet (for the place signs) and then a standing piece to secure those smaller signs to.

The boys insisted that the names of the places had to come from somewhere…

Do you know where they came from?

Halloween Party Ideas

Starting to mentally prepare for our Halloween party:

List of food possibilities

Fixing up the patio area

Finish Decorating House

Clean House

Front of House Decorations

And within each of those projects listed are twenty-three million things to do.

But I have taken some time to find some inspiration in blogville and thought I’d share with you some of the wonderful ideas I’ve found.

Harry Potter Free Potion Labels at Over the Big Moon

Halloween Lunchbox Notes from Kiki & Company

Tutorial to make “Eye” Candy Jars from Pink Polka Dot Creations

Black Widow Spider Bites from Mom On Timeout

Silhouette Pumpkins at Uncommon

Halloween Directions Post at Young and Crafty

Candy Corn Cupcakes from Our Best Bite

Mummy Dogs from Our Best Bite

and

Caramel Apple Bites from Echoes of Laughter

I love all of these ideas and plan on incorporating many of them into our Halloween party.

Hungry and inspired yet?

A Sewing Success…Barely

I had to make Caroline a new nap mat for school since Sophie (our dog) was kind enough to destroy the one we’ve had for the last 8 years.

No, I didn’t have to buy one but I thought , “I can do that. No problem!”

I am a fool.

An over confident fool who needed to be talked off the ledge several times during the sewing process.

I based my design from this nap mat which would have ended up costing me $64.

So in that instance, I am not a fool.

My nap mat came in right around $33.

Because we couldn’t find any Wonder Woman fabric, Caroline chose these flamingos.

There is no tutorial because I didn’t think many of you would want to rip out stitches and sew parts of the nap mat together that aren’t supposed to be.

(the orange blanket is sewn into one side of the nap mat )

(there is a green foam pad inserted into the nap mat – it can be taken out so that the fabric part of the nap mat can be washed)


I will tell you this, Caroline loves her nap mat, but there has not been one single nap taken on it at school.

I think she just bides her time and plans what she will play with once that unnecessary quiet time is done.


Baby Shower Prediction Cards – New on Etsy!

What’s new to Big D & Me Etsy?

Why it’s Baby Shower Prediction Cards!

These 5 in x 7 in cards are completely customizable so they will coordinate with your baby shower decor.

Is there a special verse or phrase you would like to include on the card?

Gender neutral cards are available –  Boy or Girl? What’s your guess?

Each purchase includes an 8.5 x 11 in Mom-to-Be and Dad-to-Be Measurement Card.

These measurements are the height, weight, and due dates of the soon to be parents when they were babies.

Here is an example of a possible set up for the cards at a baby shower.

Completed cards are placed into a container and may be shared during the shower.

This is a fun keepsake from your baby shower for the mom-to-be and one she will cherish for a long time.

For a limited time (one week!), these cards will be on sale for $3.05 –

So go ahead and order your Baby Shower Prediction Cards now!

***Update – The power to my parents house was back on as of Thursday at 3 pm. Their house did not have any damage so we are thankful for that. Others in Louisiana were not so lucky so please keep them in your thoughts.***

A Car Organizing Failure

The problem with being crafty is that you think, “I can make that,” no matter what item you may be looking at.

A Halloween wreath? I can make that.

A wall clock? I can make that.

A rebuilt car engine? I can make that.

The problem is, at least with me, I cannot make half the things I think I can.

 Way back in February I had a goal of organizing my car.

The main issue seems to be toys, books, and snack containers everywhere.

(This is what was recently cleaned out of the car. It fills an entire IKEA bag and that’s huge)

Because my kids seem to be in intense training to be on the show “Hoarders,” our car is constantly a mess.

Apparently it is just not possible to get into the car without having 2 stuffed animals, 3 books, and 6 random objects.

And what goes in our car, never comes out.

 So I thought, I’ll make a car organizer with material I already have.

Here’s the sad and final product.

Don’t you just love how it sags, how the velcro won’t stay closed, and how it’s too flimsy to old anything over 8 ounces?

Yes, this was my car organizing failure.

But I have found another solution to help me with keeping my car clean…and no, it doesn’t involve threatening my kids with spankings…although let’s not rule out anything just yet.

Come back tomorrow so I can show you how I fixed this problem

Hint – It involves a giveaway for you!