Caroline’s Room Plan

Whenever we paint around here my 4 year old gets super excited and asks if we are going to paint her room next.

Since nothing in her room has really changed since she was born (minus the crib change out for a big girl bed) and she’s getting ready to turn five (sniff sniff), I decided now was a good time to redo her room.

She settled on a rainbow theme.

Less than thrilled I went with it but really like what we’ve pulled together.

And by pull together I mean found around the house and made.

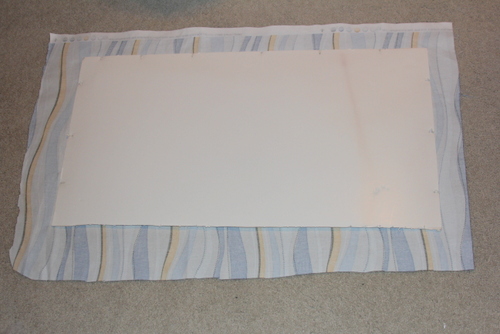
Besides the paint color (75% Repose Gray), ceiling paint (white), and the main fabric the big project in her room, I used what we already had. (Gramma will be throwing in a new comforter set once we get to that point – thanks Mom!)

And guess what?

I’m really excited with everything and so is she.

So here’s the basic plan which I put together after I had completed about half of the projects.

Caroline_Bedroom_BigDandMe


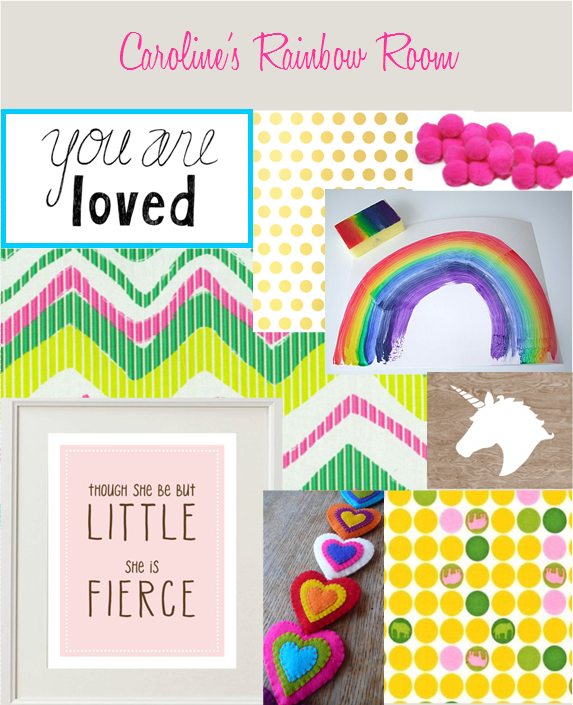
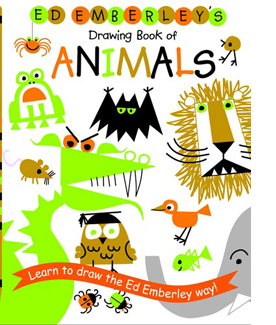
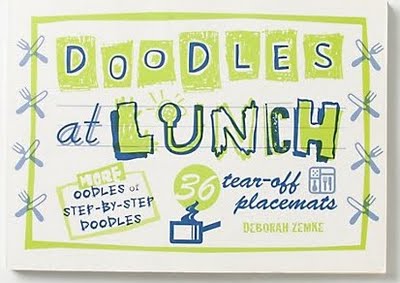
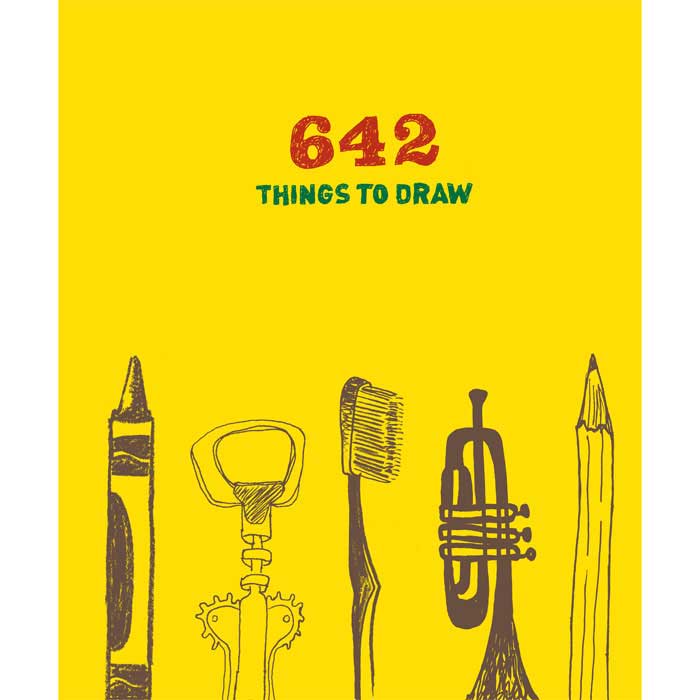
While Caroline and I made all of the art work in her room, here are the links to the pieces on the design board:

HGTV Mod All Over Fruit Punch (main fabric in room)

Robert Kauffman’s Urban Circus fabric

You are Loved print

Though she be but little print– Sugarhouse House Ink

Felt hearts – Flickr

Unicorn print – Block Party Prints

Alright, I’ve got to go work on some projects if I’m going to meet my goal of finishing her room by the end of the month.

Happy Designing!

A Birthday Crown for Years

I recently made my niece a felt birthday crown.

Happy Birthday Addy!

As you can see below, she loved it.

DSC_0169

Without a doubt, loved it.

Alright, so maybe not a fan of the birthday crowns yet but I know around age 3 she will be rocking that crown for days and days before, during, and after her birthday.

The really cool thing about this crown is that the number in front is interchangable. So if I really wanted I could make her numbers up through to about age 34 and she’d have to wear it because I would be the crazy old aunt who insists on a picture every year of her in her crown. Thankfully for Addy I only made numbers up through ten.

I followed this tutorial to make the crown.

I first used their crown template and cut out two crowns in the same felt color.

IMG_2493

I sewed the pieces together by hand. Not because it was a point of pride but because I sewed all the parts of this crown while waiting at tennis lessons, swim lessons, piano lessons, and in the school car pool line.

IMG_2496

After finishing the main part of the crown, I moved onto the felt numbers. For most of the numbers I just eyeballed them when cutting out the felt.

IMG_2497

IMG_2498

IMG_2500

Since the numbers attach to the crown with velcro, I used this fabric fusion velcro on the back of the numbers and one piece placed in the center of the crown. This velcro is so easy to use because you just iron it into place.

IMG_2504

The final step was to sew the elastic into place. The tutorial I followed used a ribbon to hold the crown together but I thought the elastic would stay on better.

IMG_2505

As a final step in sizing I made sure it would fit my 4 year old who was more than happy to model for me.

IMG_2530-001

Crown are important in a girls life dear little Addy – hope you enjoy your birthday crown for years to come!

Thankful Turkey – A Family Tradition

Each year I make a paper bag turkey and feathers for our family’s annual Thankful Turkey.

He usually gets called Tom the Turkey or Ted the Turkey and we add thankful feathers onto him each day.

Here’s a photo of our 2009 Tom:

IMG_2440

This year I decided to upgrade us to brown wrapping paper.

I know, we are the last of the big spenders.

I found a turkey picture I liked, printed it out, and drew freehand the turkey onto the brown paper.

IMG_3014 IMG_3015 IMG_3016 IMG_3022

My children have informed me that it looks like Ted is holding his private parts.

Children.

You just have to love them.

Or tell them, “Do not say Ted the turkey is holding his private parts ONE MORE TIME!”

IMG_3024

After dinner, everyone takes a feather (scrap paper I have) and writes down one thing they are thankful for that day.

After I had written my feather on the first day I asked my preschooler what she was thankful for.

She said God.

IMG_3025

I decided to take that moment to add a bit to my feather.

IMG_3026

Here are some more things we are thankful for…

IMG_3027

IMG_3029

IMG_3031

IMG_3032

IMG_3033

But don’t worry the next holiday is never far from our minds.

IMG_3030

And just to cover our bases…

IMG_3028

🙂

Mystery Boxes…Do You Dare (Halloween Party 2013)

We had our annual Halloween party this past weekend and it was a lot of fun.

Camera 360 Camera 360

As well as being quite tasty.

Camera 360

Camera 360

But….not too healthy (only some of the butter we used).

Camera 360

We may have cooked ourselves silly making sugar cookies, pumpkin whooopie pies, banana bread, oreo mummies, cupcakes, chocolate faces, pretzel witch fingers, pretzel eyeballs, marshmallow sticks, rice krispie treats, snickerdoodle cookies, and pumpkin muffins.

Camera 360

We also played a game which I think the kids enjoyed – Mystery Boxes

The idea of Mystery Boxes is to reach into the box and try and figure out what food is in there.

For example, I told the kids that I had witches hair. Once they felt it, they needed to decide what food my witches hair really was.

I took 4 boxes (Cheezits, Amazon, shoe boxes) and spray painted them or covered them in fabric with Modge Podge.

IMG_2938-001

I then glued on a piece of cloth to the outside which covered a hole I had cut out in each box.

IMG_2943

Each box on the inside was lined with tin foil. One had a cup and another had a bowl which held the food items.

IMG_2942

Before starting the game, I handed out a piece of paper to each child and told them what was in the mystery boxes – witches hair, mummy intestines, troll eyes, and Frankenstein eyes. Then I had some parents hold the boxes for me, not letting the kids peek inside the boxes.

Camera 360

Camera 360

This picture of my son reaching into the box is my favorite one from the party.

Camera 360

Here’s a sample of the sheet with their guesses on it.

IMG_2940

Here we all are talking about what each of their guesses is for the food items.

Camera 360

And the reveal….

Camera 360

In case you are wondering…

Witch Hair = Ramen Noodles

Frankenstein Eyes – Olives

Mummy Intestines = Lasagna Noodles

Troll Ears = Dried Apricots

___________________

Mystery Boxes = Silly & Slimey Fun 🙂


A Weekend Project

Why do weekend projects always end up taking until the following Thursday to complete?

Maybe it’s just us but we can never seem to complete a project in the estimated time.

Our family began collecting magnets several years ago as a keepsake from the all the places we visited.

After putting on the most recent magnets from Rome, London, and Berlin our collection looked like this…

IMG_2147

IMG_2148A big jumble of not cuteness.

It hasn’t been displayed in our new house (which we’ve been in for 3 years) so the mess was never really a problem before.

That is, until I decided that WE. MUST. COMPLETE. a weekend project and so… a new magnet board it was!

IMG_2177

I took a 36 x 24 inch picture I bought at Goodwill for $5 and popped out the picture.

Next we bought a sheet of metal ($20) at Home Depot and my husband cut it down to size.

He then nailed the metal into place.

And voila! 6 days later our weekend project was complete!

IMG_2179

Looks like we are going to have to travel a lot more to fill this up.

Actually, I’ve got a list going of the places I, We, Us, and/or &  Them have gone but forgotten to buy magnets for: Fayetteville, AR, Seattle, WA, Calloway Gardens in Georgia, Ann Arbor, MI, Gulf Shores, AL, New Mexico, Virginia, and many more.

But here’s a few of what  we do have:

Las Vegas, Fort Worth, Chicago, New Orleans

IMG_2188

Louisville, Graceland, Scotland, the USS Alabama

IMG_2187Mammoth Caves, Toronto, San Francisco, Water Color, FL

IMG_2186

Here’s the before (the picture just got moved to the dining room)

IMG_2141And the after:

IMG_2190

Can’t wait to figure out our next 6 day project!


The Most Expensive Ruler, Ever!

Let me present to you the most expensive ruler ever. EVER!

IMG_0887

The problem with enjoying crafts is that when see an item you think, “I can make that.”

When in reality, you should just by the item.

It would save you and your family a lot of pain in the long run.

At least my family wishes I would just buy it.

One afternoon I took the kids to a local craft market.

There are hundreds of vendors set up and I enjoy wondering the aisles looking at the many different projects set up.

After wondering for awhile, I saw a large beautiful white ruler. I thought it would be so much fun to write my kids heights onto it. Plus is would make a nice addition to our living room.

But I thought, $20! I can make that for cheaper.

So immediately after leaving the craft fair we headed to our local habitat restore where I found a board just the right size for $1. I had all the paints on hand so a $1 ruler it was going to be.

Not so.

After leaving the store and standing the board against the back of my car, I put Caroline in her car seat.

And that’s when I heard it.

A big crash.

“Umm, Mom, ” I heard my  11 year old say.

As I walked back to the rear of the car, I saw I had broken a tail light.

Not my tail light. SOMEONE ELSE’S TAILLIGHT!

I said, “Was that taillight already broken?”

“No Mom, the board fell and you broke the light.”

Sadly, my first instinct was to look around and hussle the boys into the car.

As I sat in the car, I realized this was the wrong thing to do and not quite the lesson I wanted to teach my kids. So I wrote my name and number on a piece of paper and left it on their windshield.

About an hour later I received a call from a gentleman wanting to know why I had put my name and number on his car window.

HE DIDN’T EVEN NOTICE.

After listening to my explanation he thanked me for letting him know and told me he would call with an estimate in a few days after he returned to his home in Tennessee.

I heard from him soon after and found out that his cousin works at a Chevrolet dealership and the new part would cost $150.

I sent him a check and remarkably a few days later his wife sent a thank you card.

So now his tail light is fixed and I have the world’s most expensive ruler

IMG_0890

IMG_0888

IMG_0885

$1 + $150 = $151 ruler

Paper Organizer for the Kitchen

 Ever since we moved into our house, almost three years ago, I have wanted a pin board in the kitchen – somewhere to hang school notes, store deals, and reminders.

I was looking at an “extra” pile we had in our guest room and I came across this old poster we had hanging in our old house.

IMG_7213

Here’s the mess I wanted to have organized on the kitchen counters.

IMG_7221

I took the frame apart and found this foam board behind the poster.

IMG_7223

I wrapped the foam board with some extra fabric and then glued it on.

IMG_7226

Yay! Simple! Free! Organized!

IMG_7227

 UPDATE:It’s all a lie.

I wrote this post 2 weeks ago and at the time it was clean. But two weeks later the area is completely messy again. You can barely see the board and no part of the counter is visible.

Just keepin’ it real folks.

Our Favorite Art Books

I love to buy artsy books for my kids (and sometimes me!) to draw with.

Now don’t get me wrong, I fully believe in blank paper in order to create but sometimes it’s just fun to try drawing an alligator or a funny person.

Here are some of our family’s favorite art books (my kids are 11, 7, and 4 if that helps):

Ed Emberly’s Drawing Book

ed emberley animals

tumblr_ls6mcuGQrE1qa81xn

Doodles at Lunch & Doodles at Breakfast: 36 Tear-Off Placemats

doodles at lunch placemat

doodles at lunch detail

Animal Doodles Place Mats

9781452107158_p0_v3_s260x420

899cce64d99b7b680e26e97813275db5

642 Things to Draw: Journal

9496007-642-things-to-draw

053

and this is the next book I want to get for our house

The Boys’ Doodling Book

boys-doodle-book

and maybe in a few years we’ll purchase this one

The Girls’ Drawing Book

9780762435050_p0_v2_s260x420

41GlO-BT0sL

Happy Drawing Everyone!

Art Holder for Markers, Crayons, Pencils, Glue Sticks, and Scissors

I have wanted an art holder for our kitchen table for awhile now.

I looked around the garage and found an old tea light candle holder that I bought at Goodwill for $3 several years ago.

My husband drilled the holes further down & then I sanded it to create this new piece.

IMG_6775

I could sand it further & then paint it but frankly that’s not going to happen anytime soon.

IMG_6831

IMG_6835

IMG_6833

IMG_6826

When the art holder is on the table I have noticed the kids drawing and creating more than usual. I place various drawing books we have as well as blank paper and watch them go to town.

IMG_6828

IMG_6774

Tomorrow I’ll share with you some of their favorite doodling books!

Cardboard Boxes – So Much Fun!

The last time I talked about Caroline’s super hero party it was concerning the scavenger hunt, bean bag toss, and the chest letters they received.

Today it’s, “Exploring the City!”

When I looked on pinterest for Caroline’s super hero party I came across party decor which had buildings with it. I thought, wouldn’t it be fun for the girls to be able to play in the buildings?

IMG_6794

Otherwise known as, “Cardboard Boxes are so Much Fun!”

One of the missions the kids had to complete was, “Explore the City.” This simply meant, bring out some cardboard boxes and let the kids have fun.

IMG_6793

A week before the party, the kids and I drove around gathering big boxes that had been discarded in the new subdivision they are building near us.

We then set up a painting station on our driveway and got to work painting the boxes.

I used regular house paint that we already had so the cost for this project was $0.  

IMG_6655

Caroline wore her painting outfit – yellow pants, old white shirt, and a pair of the boys’ old water shoes – always looks like she’s a retired Floridean 🙂

IMG_6660

IMG_6658

Everyone got in on the action.

IMG_6661

IMG_6663

Once the boxes were dry, my husband cut out doors and windows in each box.

And here are the final results –

Every Super Hero town needs a City Hall…

IMG_6851

the Movies…

IMG_6852

A Jail to put the bad guys…

IMG_6853

And the library!

IMG_6839

IMG_6844

The cardboard boxes stayed in our house another week before they were completely destroyed.

Good fun!