Easy Bathroom Shelves

You know when you walk around the house and all of a sudden you can think of nothing else but getting a project done. I actually got one of those kind of projects done last week.

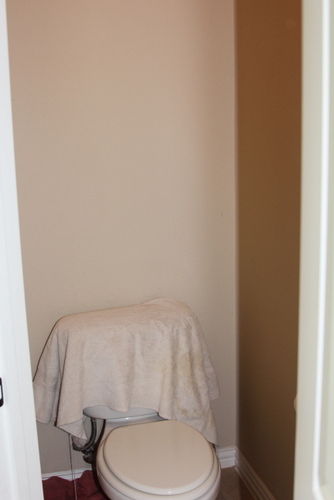
Our master bathroom area has the toilet in a separate little room. Despite this little room being in our bathroom my six year old comes into my bathroom on a daily basis and tries to talk to me through the door while shaking the door handle desperately. When I finally emerge she asks, “What were you doing in there?” Seriously. It seems to be a mystery to her.

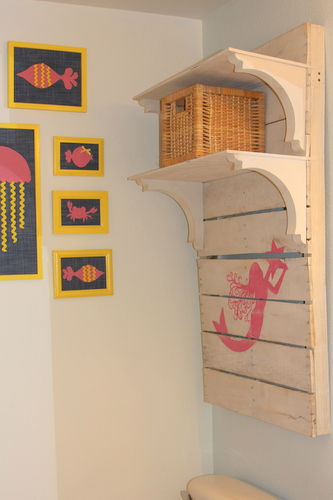
Anyway….we were trying to find a way to get some of our bathroom supplies up away from the ground since they are normally stored under our sink area.

I walked past our little room and instantly thought, “We could put shelves up in here!”

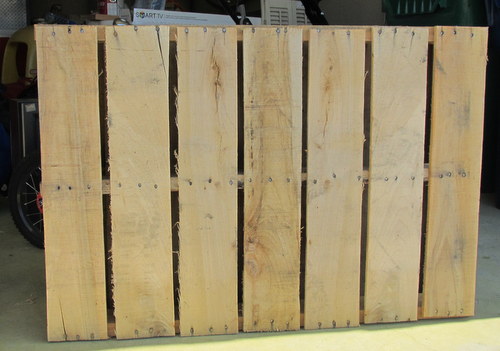
So before I could change my mind, the kids and I went off to Home Depot, bought the wood and had them cut the piece in half and bought some shelf brackets (total $42).

I then came home, poured 3 quarts of left over paint (2 light gray and 1 white) in a plastic container and starting painting the little room. The painting part of this project was unnecessary but it makes me happy and it was free.

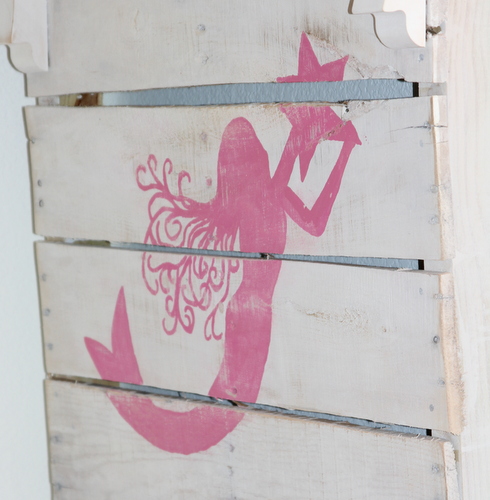
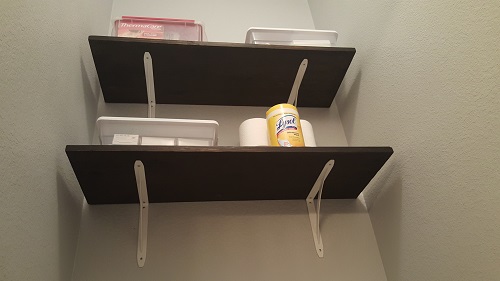
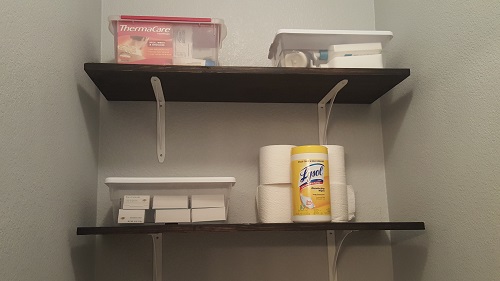
Here is the end result:

20150803_213919

Sort of looks like a before photo until you  see the before photo and then realize, “Ahhh, yes..the after is better.”

IMG_0732

My boys were very excited to help with this project. While we were walking up and down the aisles of Home Depot I heard my 13 year old tell the 10 year old, “Well when you stain you have to go with the grain.” I mean, seriously, my heart sang when I heard that.

20150803_213952

My husband and our boys sanded the wood and then stained it using a stain we already had at the house.

20150803_213933

So in the course of 2 days we got a project DONE!

Any areas of your house you just want to tackle right now?

Simple Spring (& Summer) Mantle

We recently had company coming over and an empty mantle so I looked around the house for some materials to make something.

I had recently ordered several $5, 8 x 10 canvases for our house from an online company. The pictures were from my brother’s wedding last summer so I thought they would work on the mantle for now until I put them up on the wall at some point.

IMG_9263

I had an old sewing hoop which I covered in green fabric. I then glued on some yellow ric- rac around the edge. Finally I made some fabric flowers using some leftover fabric.

IMG_9272

Searching through my crafting supplies I found some felt and decided to make some small banners with it. I created 3 separate banners but hung them up together.

IMG_9059

IMG_9274

I like the bright colors for spring / summer.

IMG_9273

*On a side note, Sherwin Williams is having a 40% off paint sale this weekend*

**My husband is absolutely delighted with this fact**

***OK, that last thing was a lie. He’s worried, oh so worried.***


Mermaid Shelf using a Pallet

Last time I shared my daughter’s bathroom with you and today I’m sharing the pallet shelving unit my husband made.

IMG_9028When we completed this project 3 years ago pallet projects were all the rage. At the time I was able to go to our local Habitat store and ask if I could have a pallet. They said sure and I got it for free. Nowadays they charge you for them.

I brought the pallet home and asked my husband to make a shelf for Caroline’s bathroom. After shaking his head and possibly rolling his eyes he got to work.

This was the only picture I could find of it in the building stages – a frame was built and then the wooden boards were attached onto it after being sanded.

IMG_2489

We then used scrap wood for the shelves and bought wooden brackets to place underneath the shelves to hold them up. After that I painted on a mermaid using pink paint.

IMG_2517

I then sanded the mermaid and pallets to add a little character to them.

IMG_9030

IMG_9028-001

And voila, the world’s heaviest shelf is made!

A “Bench” of Personality

The longer I am married the more I have come to realize that I am the big thinker in the marriage. Let’s build a house! Let’s go to Disney World! Let’s paint the piano!

All of these big ideas stress out my detailed oriented thinking husband. I never have a plan of how we are going to accomplish these things, I just always say let’s do it. My husband, ever the detail man, begins to lay down the no’s. I promptly ignore him and say we can do it! Whatever it is, I have faith in us. Whatever it is, he sees the obstacles. He’s an engineer and it shows.

I’m fairly sure it’s what makes our marriage work almost 18 years later. One of us is the gas, one of us is the brakes. Without my husband, I would surely be in debt, live in a fully decked out house, and keep up with the Jones’. (OK, I’m actually not that bad – I’m the one who cut cable to cut costs.) Without me, my husband would surely live in a house with only a mattress and a tv, drive a car from the early 90’s, and die as a lonely miser who would have prepaid his own funeral at cost. (Ok, he’s actually not that bad either – he would live with a mattress, tv, cable, and pizza delivery).

My very long and convoluted point being….I wanted to paint the piano.

“Come on…let’s paint the piano!”

My husband has not been impressed each time I have mentioned this for the past two years.

IMG_6989

In an effort to reach those 18 years of marriage and then move onto 19 I decided this was one of those things that I am just going to let drop. It’s really not that important and is a huge task.

IMG_6988

So instead we recovered the piano bench in 10 minutes on one of the snow days.

IMG_9019

Here’s how the project went down:

Me – “Here’s a piece of fabric to cover the piano bench with.”

My husband – “Is it big enough? Are we going to staple it in? Do we need to take the leather off first? Will we have to replace the hinges?

Me: “I don’t know…let’s just do it.”

IMG_9024

I believe all sides are happy with the result and thrilled that this project has come to an end.

But don’t you worry dear…I’m dreaming up all sorts of projects that you will love.

IMG_9025

Because we can do it!

A Simple & Easy Rug

Due to a rather unfortunate stomach bug that hit our family last year I needed to invest in a new bathroom rug.

I did not want to spend a lot of money because inevitably there will be another bug that will cause several of us to lay on the floor unable to muster the strength required to walk to the bed. Instead we will spend hours on the floor with our pillow and blankets moaning and groaning.

Therefore, we needed a new rug. (Plus the tile gets so darn cold and slippery).

My family and I were wandering the Habitat store one day when I stumbled upon carpet squares for $1.99. We searched through piles and piles of squares to find just the right ones with the pattern I wanted and the quality my husband wanted.

We found 8 tiles that were good so we went home, placed them in a corner of our bedroom, and left them there for 8 months.

I kid you not. That’s sort of our MO around here.

Finally one day we dragged them into the bathroom and started the incredibly tedious and time consuming project of taping them together.

I think it took 15 minutes.

IMG_5190 IMG_5191 IMG_5192

We chose to alternate the carpet squares so that the pattern would be a little more interesting than just straight lines.

IMG_5194 IMG_5195 IMG_5196

A new 4 ft x 8 ft carpet in the bathroom.

I still need to add some glue strips, using a glue run, to the bottom to keep the carpet from moving around.

I’m aiming for 2016 to complete that project.

She is Fierce: Bedroom Art

Anyone who knows my four year old knows that she has a mind of her own.

I present to you one of her latest self chosen preschool outfits as a small piece of evidence.

IMG_3903

So when I came across the Shakespeare quote, “And though she be but little, she is fierce,” I knew it described Caroline and it would be perfect somewhere in her room.

One day while the boys were at school Caroline and I made this sign:

IMG_4130-001

Here’s how we made it:

We found a board in the garage that was roughly 1 1/2 ft by 3 1/2 feet and gathered some paints. Since this is going in her “rainbow room” we grabbed an assortment of colors.

IMG_3953

We then slapped on some color with the foam brushes, pausing after each color to dry the paint with the hair dryer.

IMG_3956

IMG_3954

“Please don’t touch the hair dryer it’s hot.”

IMG_3957

Aaaaaand we touch it anyway.

IMG_3958

I’m thinking maybe I should make another sign that says, “And though she has good hearing, she chooses to ignore most of what her momma says.”

After we had covered the entire board with bright colors I took some gold paint and randomly placed it on the board and completely around the edges.

IMG_3961

IMG_3962

I then found some leftover vinyl letters that we used on science fair boards several years ago and fashioned them into the letters we needed. I cut the letters and number below to create “she.”

IMG_3969

Once all of the letters are arranged the way you would like them, peel the stickers off and place them onto your board.

IMG_3967

IMG_3970

For the last step, I spray painted the entire sign white. Once the sign is dry, peel off the letters to discover the fun design underneath.

IMG_3974

IMG_3979

The sign is now sitting on Caroline’s bed frame waiting to be hung up

IMG_4130Describes her perfectly.

Man I love that kid.


Independent. Spirited. FIERCE.

Caroline’s Room Plan

Whenever we paint around here my 4 year old gets super excited and asks if we are going to paint her room next.

Since nothing in her room has really changed since she was born (minus the crib change out for a big girl bed) and she’s getting ready to turn five (sniff sniff), I decided now was a good time to redo her room.

She settled on a rainbow theme.

Less than thrilled I went with it but really like what we’ve pulled together.

And by pull together I mean found around the house and made.

Besides the paint color (75% Repose Gray), ceiling paint (white), and the main fabric the big project in her room, I used what we already had. (Gramma will be throwing in a new comforter set once we get to that point – thanks Mom!)

And guess what?

I’m really excited with everything and so is she.

So here’s the basic plan which I put together after I had completed about half of the projects.

Caroline_Bedroom_BigDandMe


While Caroline and I made all of the art work in her room, here are the links to the pieces on the design board:

HGTV Mod All Over Fruit Punch (main fabric in room)

Robert Kauffman’s Urban Circus fabric

You are Loved print

Though she be but little print– Sugarhouse House Ink

Felt hearts – Flickr

Unicorn print – Block Party Prints

Alright, I’ve got to go work on some projects if I’m going to meet my goal of finishing her room by the end of the month.

Happy Designing!

A Little Bead Art

I’ve got another weekend project for you and this actually only took a weekend to complete! Woohoo!

The last weekend project culminated in completing this magnet board above our piano.

IMG_2190

I went ahead and worked on another project and here’s the piano area now.

IMG_2194

I took a $1 garage sale frame and spray painted it the same color as the magnet board.

IMG_2195-001

I then asked my husband to hang the empty frame on the wall.

He said, “So you want me to put some metal into this frame?”

“No, just hang it.”

“Do you want me to add a piece of wood so it has a back.”

“No, just hang it.”

Weird disgusted look sent my way.

“Pleeeease just hang it.”


IMG_2196

“M” steps:

1) Drive to New Orleans during Mardi Gras and collect a lot of beads.

2) Look at huge bag of Mardi Gras bag of beads in your closet for months and wonder what you are going to do with all of them.

3) Buy a cardboard “M” at JoAnn’s with a coupon for $1.50 and spray paint it.

IMG_2149

4) Cut strands of beads into individual beads.

5) Hot glue the beads on while watching 10 DVR’d episodes of The Middle.

IMG_2155

6) Paint the sides black because you are tired of gluing beads onto the “M” and you just want to get done with the project.

IMG_2197

IMG_2195-002


7) Look at remaining 3/4 full bag of beads and decide to try and sell a bag of them at the upcoming consignment sale and bill them as “Princess Jewels.”

IMG_2194

2 projects down, countless to go!


A Weekend Project

Why do weekend projects always end up taking until the following Thursday to complete?

Maybe it’s just us but we can never seem to complete a project in the estimated time.

Our family began collecting magnets several years ago as a keepsake from the all the places we visited.

After putting on the most recent magnets from Rome, London, and Berlin our collection looked like this…

IMG_2147

IMG_2148A big jumble of not cuteness.

It hasn’t been displayed in our new house (which we’ve been in for 3 years) so the mess was never really a problem before.

That is, until I decided that WE. MUST. COMPLETE. a weekend project and so… a new magnet board it was!

IMG_2177

I took a 36 x 24 inch picture I bought at Goodwill for $5 and popped out the picture.

Next we bought a sheet of metal ($20) at Home Depot and my husband cut it down to size.

He then nailed the metal into place.

And voila! 6 days later our weekend project was complete!

IMG_2179

Looks like we are going to have to travel a lot more to fill this up.

Actually, I’ve got a list going of the places I, We, Us, and/or &  Them have gone but forgotten to buy magnets for: Fayetteville, AR, Seattle, WA, Calloway Gardens in Georgia, Ann Arbor, MI, Gulf Shores, AL, New Mexico, Virginia, and many more.

But here’s a few of what  we do have:

Las Vegas, Fort Worth, Chicago, New Orleans

IMG_2188

Louisville, Graceland, Scotland, the USS Alabama

IMG_2187Mammoth Caves, Toronto, San Francisco, Water Color, FL

IMG_2186

Here’s the before (the picture just got moved to the dining room)

IMG_2141And the after:

IMG_2190

Can’t wait to figure out our next 6 day project!


The Most Expensive Ruler, Ever!

Let me present to you the most expensive ruler ever. EVER!

IMG_0887

The problem with enjoying crafts is that when see an item you think, “I can make that.”

When in reality, you should just by the item.

It would save you and your family a lot of pain in the long run.

At least my family wishes I would just buy it.

One afternoon I took the kids to a local craft market.

There are hundreds of vendors set up and I enjoy wondering the aisles looking at the many different projects set up.

After wondering for awhile, I saw a large beautiful white ruler. I thought it would be so much fun to write my kids heights onto it. Plus is would make a nice addition to our living room.

But I thought, $20! I can make that for cheaper.

So immediately after leaving the craft fair we headed to our local habitat restore where I found a board just the right size for $1. I had all the paints on hand so a $1 ruler it was going to be.

Not so.

After leaving the store and standing the board against the back of my car, I put Caroline in her car seat.

And that’s when I heard it.

A big crash.

“Umm, Mom, ” I heard my  11 year old say.

As I walked back to the rear of the car, I saw I had broken a tail light.

Not my tail light. SOMEONE ELSE’S TAILLIGHT!

I said, “Was that taillight already broken?”

“No Mom, the board fell and you broke the light.”

Sadly, my first instinct was to look around and hussle the boys into the car.

As I sat in the car, I realized this was the wrong thing to do and not quite the lesson I wanted to teach my kids. So I wrote my name and number on a piece of paper and left it on their windshield.

About an hour later I received a call from a gentleman wanting to know why I had put my name and number on his car window.

HE DIDN’T EVEN NOTICE.

After listening to my explanation he thanked me for letting him know and told me he would call with an estimate in a few days after he returned to his home in Tennessee.

I heard from him soon after and found out that his cousin works at a Chevrolet dealership and the new part would cost $150.

I sent him a check and remarkably a few days later his wife sent a thank you card.

So now his tail light is fixed and I have the world’s most expensive ruler

IMG_0890

IMG_0888

IMG_0885

$1 + $150 = $151 ruler